Initiating a Prior Authorization Using a TRX Code
To initiate a prior authorization, click the Add New PA button at the top of the screen after logging into the Prior Authorization Portal.
On the Create New Prior Authorization page, enter a TRX code in the provided field and then click Submit, or click the Start Prior Authorization button and complete the on-screen forms as required for the patient.
Note: Upon submitting a TRX code or new prior authorization, a task will be added to the user’s Worklist for it.
Auto-Adding TRX Code Configuration
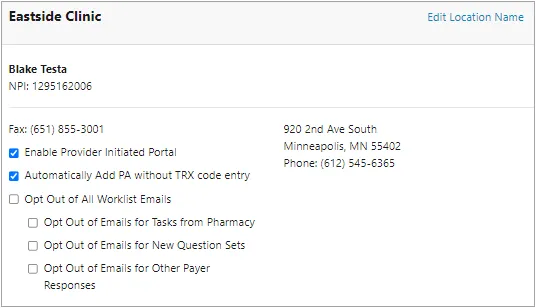
Locations can be configured to automatically add future PA initiate tasks to the worklist. Future TRX codes that would be delivered via a fax would instead be automatically added to the worklist where the PA could be initiated. Users have the ability to receive an email notification when these tasks are added to the worklist.
To configure automatically adding a PA initiation task:
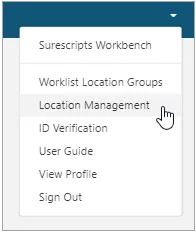
- Open Location Management from the user menu.
Note: The prescriber associated to the location must be ID-verified to have access to this feature. For more information, see Prescriber ID Verification ProcessPrescriber ID Verification Process.
- Find the location to be configured, and then select the desired options for it as shown below. For more details on these settings, refer to Adding and Editing LocationsAdding and Editing Locations.